
I'm so excited to be sharing images from Kristie and Brad's GORGEOUS winter wedding on the blog this week.
I'm almost finished putting the final touches on their collection, but in the mean time...I want to use some of these sneak peeks to touch on what I've learned about shooting Winter weddings, because let's face it...it's a completely different ball game.
1. THE FIRST LOOK IS KEY
First looks are magical in terms of creating the perfect timeline for your wedding day...but when we're talking Winter weddings, where the sun sets around 4pm, it couldn't be more important.
Rearranging the wedding day events so that all of the bridal portraits, wedding party formals, and family shots are done BEFORE the ceremony, gives us the best use of the natural light. Sneaking in family photos before the reception is rarely a problem for a July wedding because we have sunlight until after 7pm!


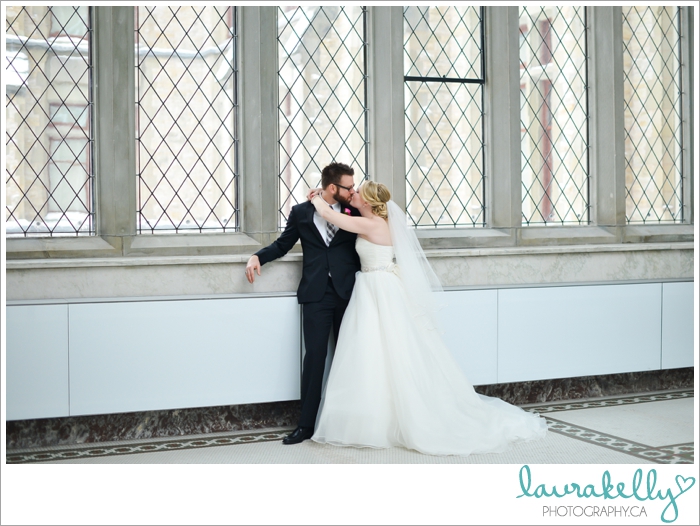
2. FIND A GREAT SPOT FOR INDOOR PHOTOS
If you're a newer photographer, there are many ways to find locations that allow indoor wedding photos (and at the same time, you'll figure out the locations that definitely DON'T allow photos).
Joining photographer networks for your city on Facebook will be a great resource for finding out information like this. Or, if you're less social, do a google search for Winter weddings in your area, and take a note of where the photographer did the formals.
The Museum of Nature is a location that was recommended to me by a fellow photographer, and I'm REALLY happy that Kristie and Brad decided it would be the location for their photos.

3. BUILD IN TIME FOR YOUR CAMERA TO CLIMATIZE.
Your camera gets nice and toasty warm when you're shooting indoors, but as soon as you step out into the cold, your lens will likely fog up over the next few minutes.
I always do a test of my gear by stepping out into the cold the morning before a shoot, to see how long it takes for the fog to clear away on its own. On this particular day, it only took between 5-7 minutes, so I made sure to build that little bit of time into Kristie and Brad's timeline.
My assistant, Lisa, and I stepped outside while Kristie and Brad were making their way down the stairs from the Museum, so that by the time they were in position, my camera was already ready to shoot.
I use this same principle for shooting destination weddings too, and because of the humidity in the Dominican Republic when I was there for Stephanie and Richard's wedding, my camera needed close to 35 minutes to climatize. Simple fix though, I just brought it to breakfast with me and ate outside :)
(P.S...don't be deceived by Kristie's bare arms, it was a chilly one and she's just a rockstar!)

4. WHITE BALANCE IS MORE IMPORTANT THAN EVER.
When you're dealing with a snowy background, having the correct white balance is so important. Any orange or green tints will show up EXTRA harsh when you're looking at a white dress in front of a snowy yard, so this is certainly an example of how shooting in Kelvin comes in handy.
Before Trevor Dayley's workshop, I really only shot in Auto White Balance, but by the time he finished with me, I was shooting 100% manual, also known as Kelvin. If you are well on your way to setting your shutter and aperture manually, then this is definitely something to look into :)

I'm almost finished putting the final touches on their collection, but in the mean time...I want to use some of these sneak peeks to touch on what I've learned about shooting Winter weddings, because let's face it...it's a completely different ball game.
1. THE FIRST LOOK IS KEY
First looks are magical in terms of creating the perfect timeline for your wedding day...but when we're talking Winter weddings, where the sun sets around 4pm, it couldn't be more important.
Rearranging the wedding day events so that all of the bridal portraits, wedding party formals, and family shots are done BEFORE the ceremony, gives us the best use of the natural light. Sneaking in family photos before the reception is rarely a problem for a July wedding because we have sunlight until after 7pm!
Kristie and Brad's timeline was superb...so much so, that I think it could be helpful to share it here.
8:00am: hair and makeup for Kristie
10:00am: photographing details of Kristie and Brad getting ready
12:30pm: everyone makes their way to first look location
1:00pm: first look
1:30pm: wedding party joins us for wedding party photos
2:00pm: immediate family joins us for family photos
3:00pm: ceremony
4:00pm: a few final photos with extended family
5:00pm: cocktails & mingling at the reception
Because of the first look, Kristie and Brad were able to join their guests for the reception much earlier, and everything was done using natural light.
Oh, and did I forget to mention that first looks are the CUTEST bride & groom moments ever?!
I mean, look at this little twirl...
2. FIND A GREAT SPOT FOR INDOOR PHOTOS
If you're a newer photographer, there are many ways to find locations that allow indoor wedding photos (and at the same time, you'll figure out the locations that definitely DON'T allow photos).
Joining photographer networks for your city on Facebook will be a great resource for finding out information like this. Or, if you're less social, do a google search for Winter weddings in your area, and take a note of where the photographer did the formals.
The Museum of Nature is a location that was recommended to me by a fellow photographer, and I'm REALLY happy that Kristie and Brad decided it would be the location for their photos.
One thing to be conscious of, is having enough room to photograph groups of family members in the chosen location, without having people in the background.
Also, note the reflection of the huge window directly behind me, which is allowing me to use the natural light as my only light source.
3. BUILD IN TIME FOR YOUR CAMERA TO CLIMATIZE.
Your camera gets nice and toasty warm when you're shooting indoors, but as soon as you step out into the cold, your lens will likely fog up over the next few minutes.
I always do a test of my gear by stepping out into the cold the morning before a shoot, to see how long it takes for the fog to clear away on its own. On this particular day, it only took between 5-7 minutes, so I made sure to build that little bit of time into Kristie and Brad's timeline.
My assistant, Lisa, and I stepped outside while Kristie and Brad were making their way down the stairs from the Museum, so that by the time they were in position, my camera was already ready to shoot.
I use this same principle for shooting destination weddings too, and because of the humidity in the Dominican Republic when I was there for Stephanie and Richard's wedding, my camera needed close to 35 minutes to climatize. Simple fix though, I just brought it to breakfast with me and ate outside :)
(P.S...don't be deceived by Kristie's bare arms, it was a chilly one and she's just a rockstar!)
4. WHITE BALANCE IS MORE IMPORTANT THAN EVER.
When you're dealing with a snowy background, having the correct white balance is so important. Any orange or green tints will show up EXTRA harsh when you're looking at a white dress in front of a snowy yard, so this is certainly an example of how shooting in Kelvin comes in handy.
Before Trevor Dayley's workshop, I really only shot in Auto White Balance, but by the time he finished with me, I was shooting 100% manual, also known as Kelvin. If you are well on your way to setting your shutter and aperture manually, then this is definitely something to look into :)
Shooting Winter weddings is something that I wish I knew more about when I first started, so that I could have avoided shooting bridal portraits at 5pm in the DARK, with the snow turning up slightly BLUE and my clients' cheeks turning bright pink while I wiped the fog off my lens before every photo.
Not fun. Not fun.
Anyway, I hope this proved helpful for some of my photographer friends who are just starting out! And as I said, I am super excited to share more from Kristie and Brad's wedding day :)
Happy Tuesday my friends!


I love your pictures!!! So talented!!!!
ReplyDeletethank you monica!! :)
Delete